


I have had some experience working on OpenID Connect.
Exploring Auth0 has made me realize one thing, it cant get simpler than this. Setting up identity with Auth0 was a delight, most of the time I didn't even need to look at the documentation (am I bragging or was the interface so user friendly?)

We will take a look at Stonks, a simple crypto listing app using Blazor WebAssembly and Auth0. The Blazor WebAssembly framework provides us with a frontend and a fake backend project, we will integrate Auth0 on both. From the backend logic we are going to make a call to coinapi.io to fetch a list of crypto currencies, narrow it down to a few thousand cryptos(why are there 12k+ cryptos?) and display them in our Blazor UI.
Apps and tools
- An IDE for .NET projects -> VS or VSCode or Rider
- Latest version of VS would automatically install .NET 5 for us
- Auth0 -> auth + identity
- Coinapi.io -> fetch list of cryptos
- jwt.io -> decrypt and analyze jwt tokens
TL;DR
I have attached some demo videos on the different connection types in Auth0, their setup and behaviour. Head over to the end of the post and take a peek.
Step1 - Bootstrap a blazor project
We will create the base Blazor project first.
- Open command line
- Go to the directory where you would want to create your projects, for me its
cd StonksApplication - Bootstrap the projects using
dotnet new blazorwasm --hosted, this command will create a Client, a Server, and a Shared project for us. The final structure should look like. ├── Client # Client project │ ├── Pages │ ├── Shared │ └── ... ├── Server # Backend project │ ├── Controllers │ └── ... ├── Shared # Shared Library │ └── ... └── ... - Open the solution inside VisualStudio, inside cmdline
start StonksApplication.sln - One VisualStudio is up, we will go ahead and run the application
For me the application loads at https://localhost:44304
Step2 - Auth0 setup
Once we have created and verified our Auth0 account, we will go ahead and setup the following
- Application
- Callbacks and CORS
- API resources
- Users
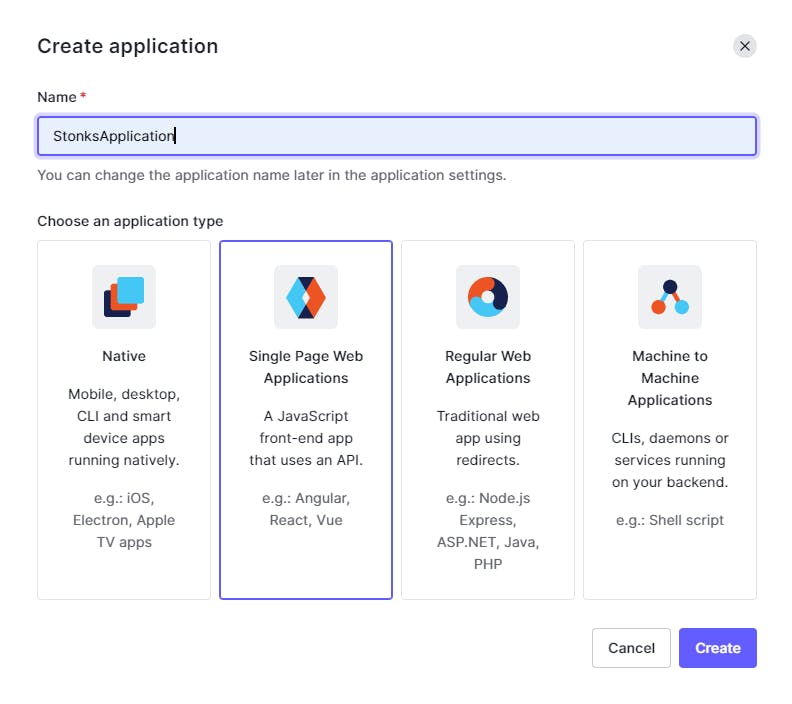
Setup Application
Since ours is a SPA we will select that type while creating.
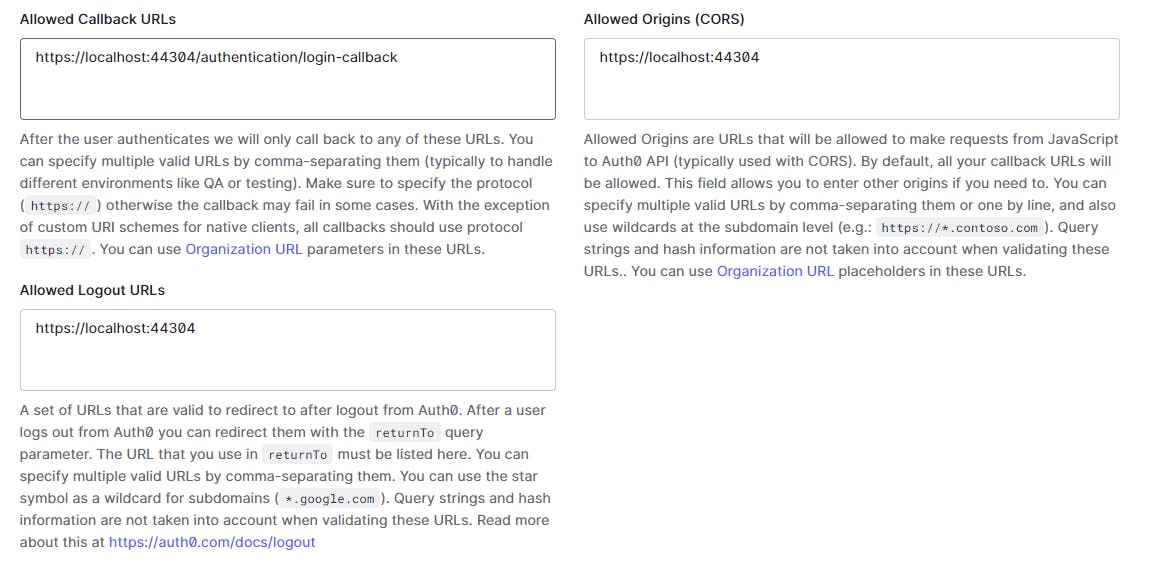
 Setup Callbacks and CORS
In the application settings page set the following values (the description against the setting tells us exactly they are meant for)
 We use the same base url where our app is running
Allowed Callback URLs -> https://localhost:44304/authentication/login-callback (this is the default blazor middleware callback path)
Allowed Logout URLs -> https://localhost:44304
Allowed Origins (CORS) -> https://localhost:44304
Setup API resources
For our backend API, we will go ahead and create an API resource
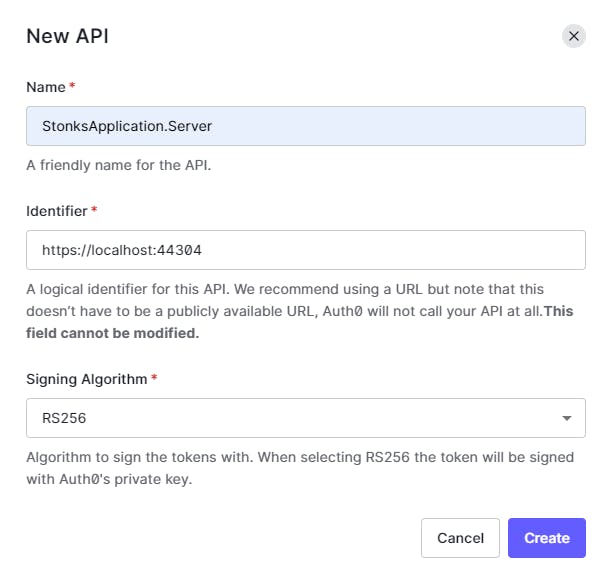 Identifier -> https://localhost:44304/
The identifier(a.k.a audience) is critical, and in simple words mean "this API resource can be accessed by whosoever has this identifier".
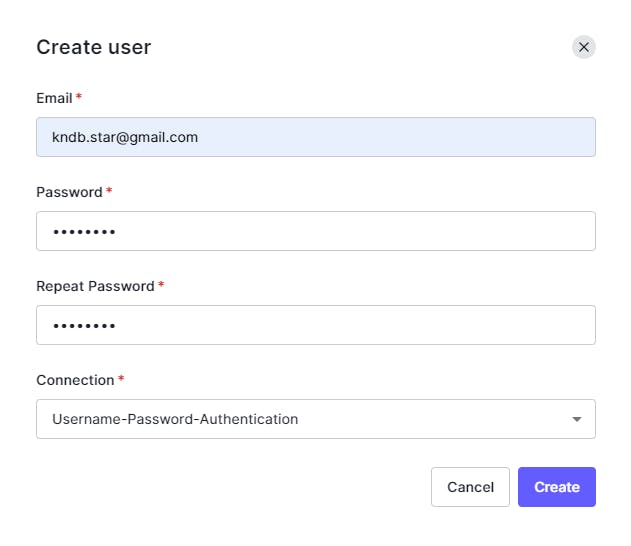
Users
We will also go ahead and create one user under the User Management tab. We will use this user to login in our application.
Basic Auth0 configuration is now in place.

Step3 - Configure Blazor projects for Auth0
We will configure Auth0 for our projects
- StonksApplication.Client
- StonksApplication.Server
Configure Auth0 in Client project
For brevity we are going to take a look at the major code blocks/components only.
- Under
wwwrootfolder create aappsettings.jsonfile.
Add a json object which holds the following configurations from Auth0.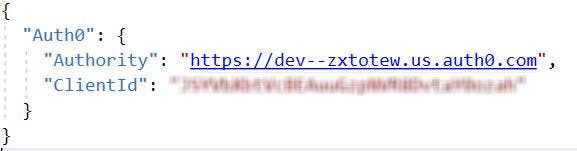
- Configure oidc authentication inside
Program.cs.
public class Program
{
    public static async Task Main(string[] args)
    {
        ...
        builder.Services.AddOidcAuthentication(options =>
        {
            builder.Configuration.Bind("Auth0", options.ProviderOptions);
            options.ProviderOptions.ResponseType = "code";
        });

        await builder.Build().RunAsync();
    }
}
Fetch and bind configuration from appsettings.json using builder.Configuration.Bind("Auth0", options.ProviderOptions);
Set the client to follow authorization_code flow using options.ProviderOptions.ResponseType = "code";. More on flows here.
Weird BLAZOR issue
As part of oidc configuration I should be also allowed to setup the audience property for my client, if missing, that would result into auth issues. More about it in later sections of the post, for now we move on.
- Under
Pagesfolder createAuthentication.razorwhich deals with login, logout authentication actions
@page "/authentication/{action}"
@using Microsoft.AspNetCore.Components.WebAssembly.Authentication
@using Microsoft.Extensions.Configuration

@inject NavigationManager Navigation
@inject IConfiguration Configuration

<RemoteAuthenticatorView Action="@Action">
    <LogOut>
        @{
            var authority = (string)Configuration["Auth0:Authority"];
            var clientId = (string)Configuration["Auth0:ClientId"];
            Navigation.NavigateTo($"{authority}/v2/logout?client_id={clientId}&returnTo={Navigation.BaseUri}");
        }
    </LogOut>
</RemoteAuthenticatorView>
@code{
    [Parameter] public string Action { get; set; }
}
- Under
Sharedfolder, createAccessControl.razorwhich will have a label for username, login and logout buttons.
@using Microsoft.AspNetCore.Components.Authorization
@using Microsoft.AspNetCore.Components.WebAssembly.Authentication
@inject NavigationManager Navigation
@inject SignOutSessionStateManager SignOutManager
<AuthorizeView>
<Authorized>
Hello, @context.User.Identity.Name
<button @onclick="BeginSignOut">Log out</button>
</Authorized>
<NotAuthorized>
<button @onclick="BeginSignIn">Log in</button>
</NotAuthorized>
</AuthorizeView>
@code{
private async Task BeginSignOut(MouseEventArgs args)
{
await SignOutManager.SetSignOutState();
Navigation.NavigateTo("authentication/logout");
}
private async Task BeginSignIn(MouseEventArgs args)
{
Navigation.NavigateTo("authentication/login");
}
}
- Create a new
Stonks.razorunderPagesfolder, this is the component where we will display the list of cryptos.
Mark the page withAuthorizeattribute, this will force the user to login to view this page.
@page "/stonks"
@using StonksApplication.Shared
@attribute [Authorize]
Configure Auth0 in Server project
For brevity we are going to take a look at the major code blocks/components only
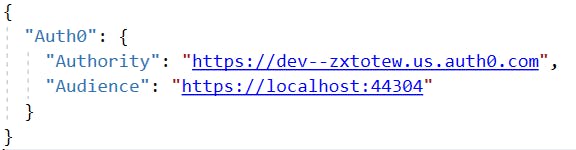
- Inside appsettings.json file add a json object which holds the following configurations from Auth0.
- Inside Startup.cs file of the project, setup authentication service
public void ConfigureServices(IServiceCollection services)
        {
            ...
            services.AddAuthentication(options =>
            {
                options.DefaultAuthenticateScheme = JwtBearerDefaults.AuthenticationScheme;
                options.DefaultChallengeScheme = JwtBearerDefaults.AuthenticationScheme;
            }).AddJwtBearer(options =>
            {
                options.Authority = _configuration.GetValue<string>("Auth0:Authority");
                options.Audience = _configuration.GetValue<string>("Auth0:Audience");
            });
        }
Set DefaultAuthenticateScheme and DefaultChallengeScheme to Bearer. We want to use jwt tokens for auth inside our Server by default.
Set the Authority and Audience values from appsettings.json as well.
This setup makes sure jwt(bearer token) validations are in place.
- Create a controller, mark the controller with the
Authorizeattribute. Only authorized requests will be allowed to go through from here on.
[ApiController]
[Route("v1/stonks")]
[Authorize]
public class StonksController : ControllerBase
{
       public StonksController()
        {
               ...
        }
}
With all of this in place, along with a few additional stuff like
- Attaching access tokens to API calls from Client To Server
- Coinapi setup inside Server, making API calls to coinapi to fetch list of cryptos
- Weird Blazor issue resolution
- Code cleanup
Here is the final result (the user was created while setting up Auth0)
I did spend more time exploring other connection types and super excited to share them too.
Had alot of wow!! moments along the way.
- Enterprise OIDC(extra setup was done on remote-identity-provider to allow calls from auth0 and a different user)
- Passwordless
- Social
Placeholder for video.
I had a lot of fun exploring Auth0, hope you had some takeaways from it.
In future I do plan to write about OIDC, OAuth and experiences in my blog. Thanks!
Additional resources
- Github repo github.com/kndb-star/StonksApplication
- Open issue in Blazor github.com/dotnet/aspnetcore/issues/20813
😡 Blazor issue
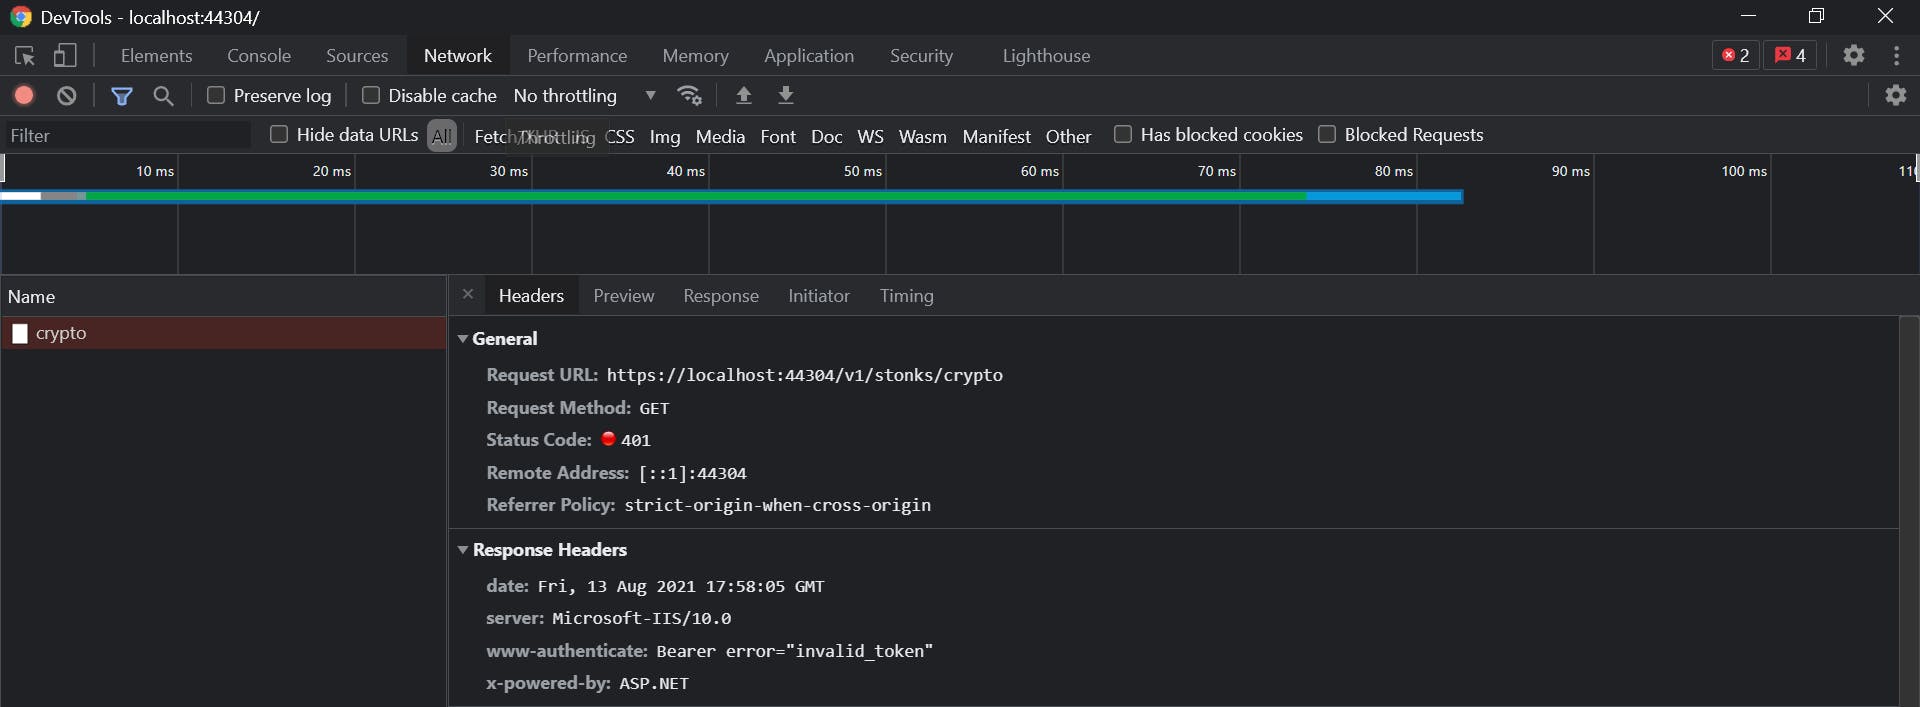
Calls to StonksApplication.Server kept on failing with a 401 httpstatus code.
 After successful login, as a result of our oidc setup in StonksApplication.Client, we get a id_token and access_token from Auth0. We can clearly see something is wrong with the access token (they are usually bigger in length)
 As part of our login flow we couldn't pass the audience in the login request. And that was the root of all my hair pulling.
Copy the access token, head to jwt.io, and decode the same
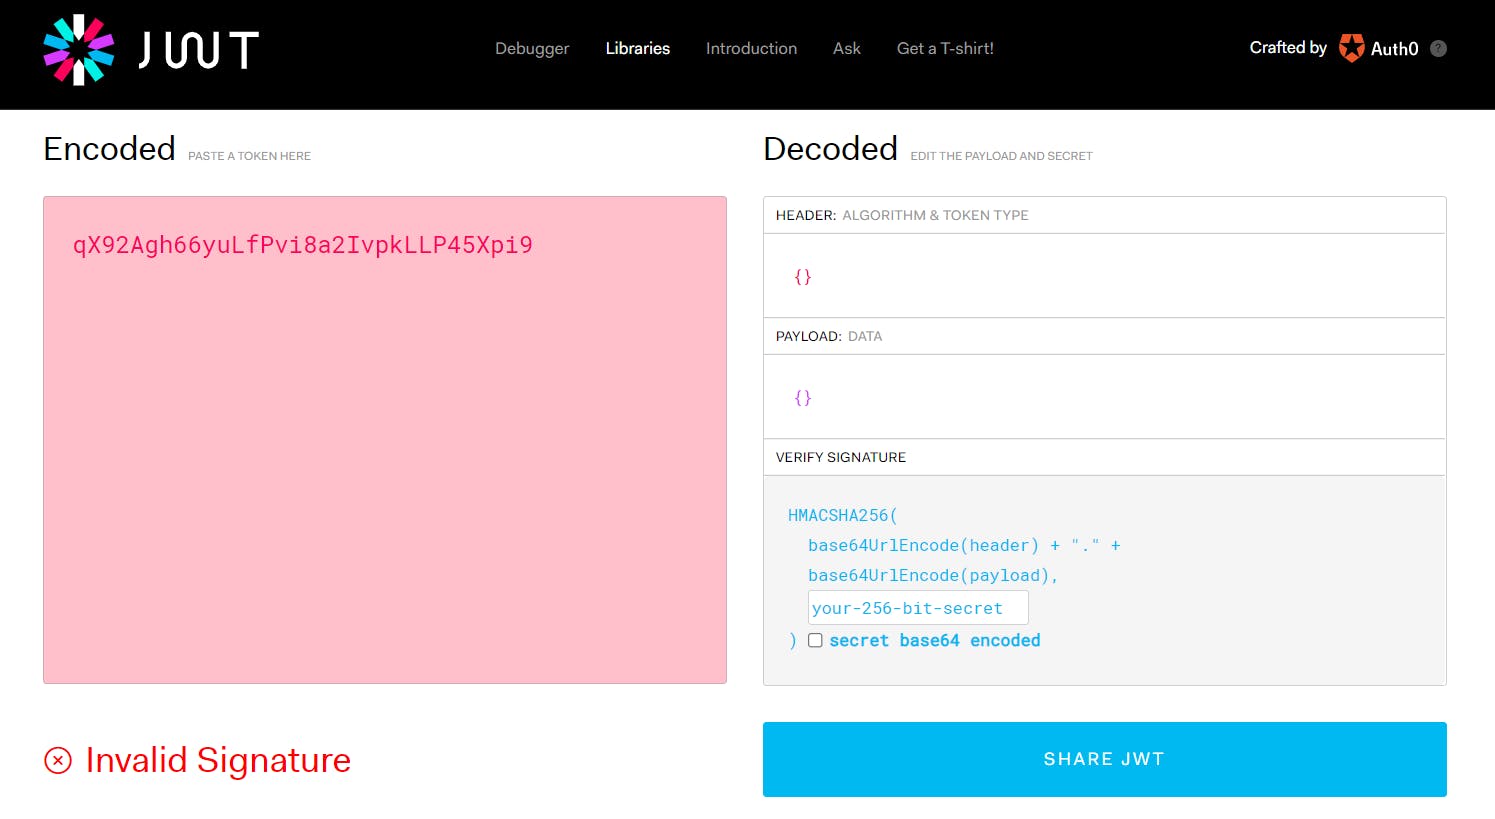 We can confirm the token is invalid.
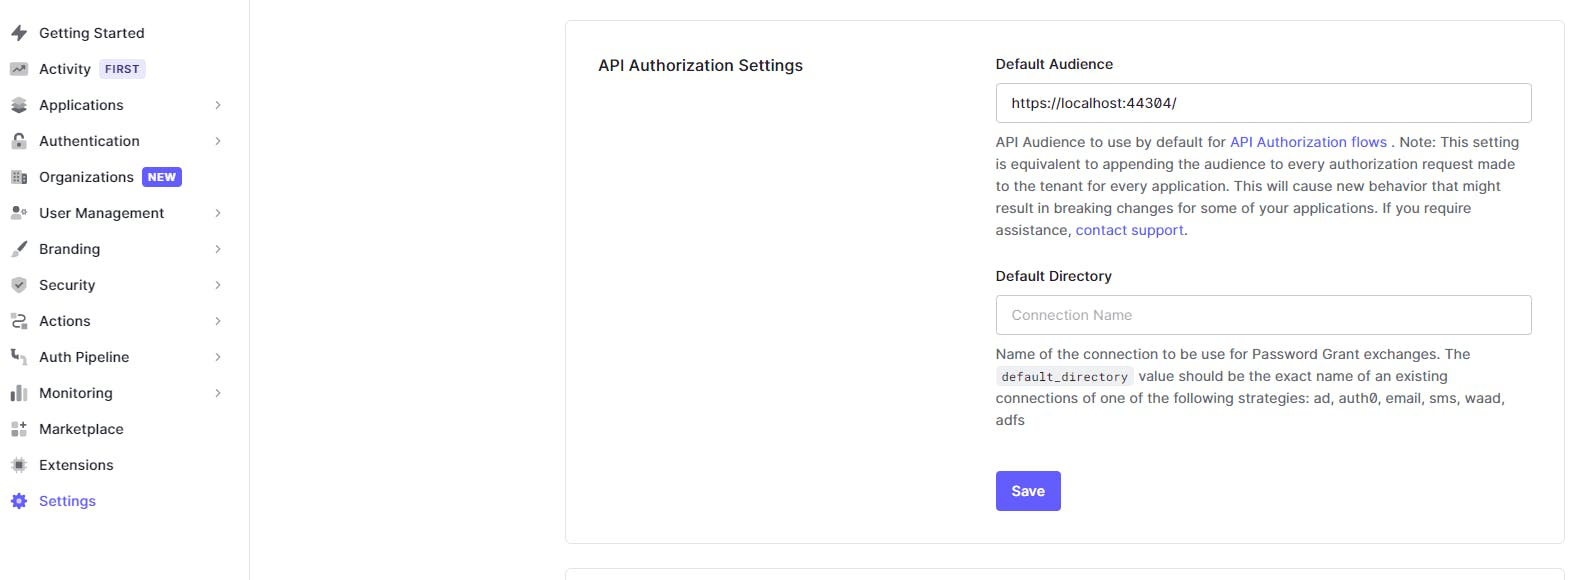
From Auth0 docs, one way to solve this would be to set the audience value for all applications inside our Auth0 tenant. Basically, instead of the client requesting, we force set this.
 We logout and login in our StonksApplication, and this time we see a different access token.
 Copy the access token, head to jwt.io, and decode the same again
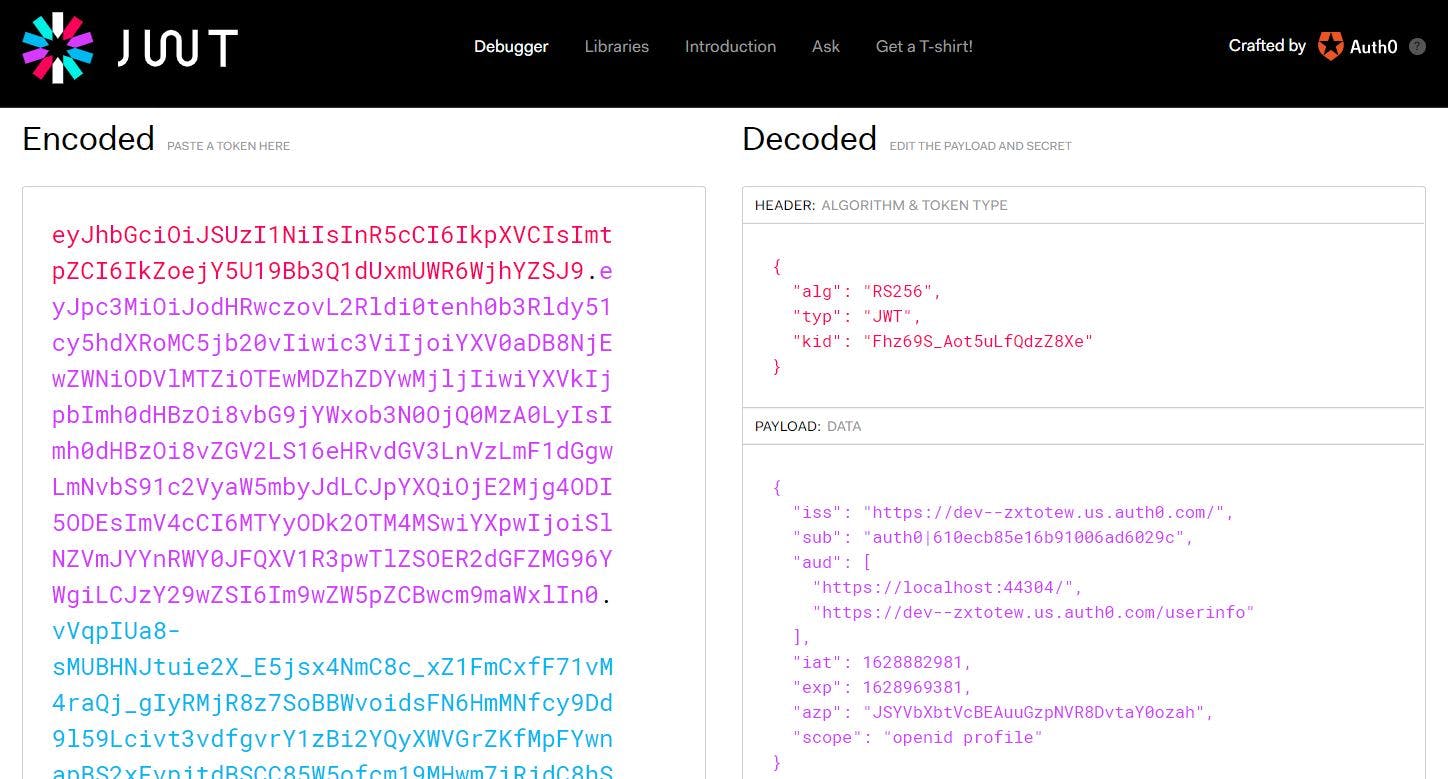 Our API calls are going through now.